
As a teen, having a dedicated space for study and sleep is crucial for productivity and well-being. Unfortunately, many teens struggle with cluttered rooms that lack organization, making it hard to focus on schoolwork or get a good night’s sleep. This can lead to stress and poor academic performance. The solution? Creating a well-defined study and sleep area that encourages both productivity and relaxation.
In this guide, you’ll learn how to transform your bedroom into a functional and inviting space where you can excel in your studies and enjoy restful sleep. By following these simple steps, you’ll accomplish a beautifully organized room that enhances your daily routine. Get ready to boost your focus and improve your sleep quality!
This is a beginner level project that can be completed in about 2-3 hours. Let’s dive in and get started!
TL;DR Summary
- Create a designated study area with proper lighting and organization.
- Choose a comfortable bed and bedding for better sleep quality.
- Incorporate personal touches to make the space inviting.
- Follow tips to avoid common mistakes for an effective setup.
TL;DR Summary
Editor’s Choice

Niagara Sleep Solution Ultra Soft Queen Size Mattress Topper – Rayon Der…

Airlonv LED Desk Lamp for Office Home, Eye-Caring Desk Light with Steple…

xympo Floating Invisible Bookshelf Wall Mounted (Set of 4) – Aluminum – …
Prerequisites/Materials Needed
- Desk or study table
- Comfortable chair
- Good quality desk lamp
- Notebooks and stationery
- Books and study materials
- Bed and bedding (sheets, comforter, pillows)
- Storage solutions (bins, shelves)
- Decor items (posters, plants)
Prerequisites/Materials Needed
Editor’s Choice

amseatec Criss Cross Office Chair, PU Leather Vanity Chair with 5-Level …

Floating Shelves for Bedside Shelf, Stick On Accessories Organizer, Dorm…

15W LED Desk Lamp with USB Charging Ports – Dimmable Table Lamp with 3…
Skill Level & Time Estimate
Skill Level: beginner
Total time estimate: 2-3 hours
Breakdown of time:
- Planning and organizing: 30 minutes
- Setting up the study area: 1 hour
- Arranging the sleep space: 1 hour
- Personalizing the space: 30 minutes
Skill Level & Time Estimate
Editor’s Choice

Marbrasse Mesh Desk Organizer, Pen Organizer with 2 Drawer, Multi-Functi…

LED Desk Lamp with USB Ports,Touch Desk Lamps for Home Office with 5 Col…

Love’s cabin Seersucker Lavender Twin Comforter Set 5 Pieces, All Season…
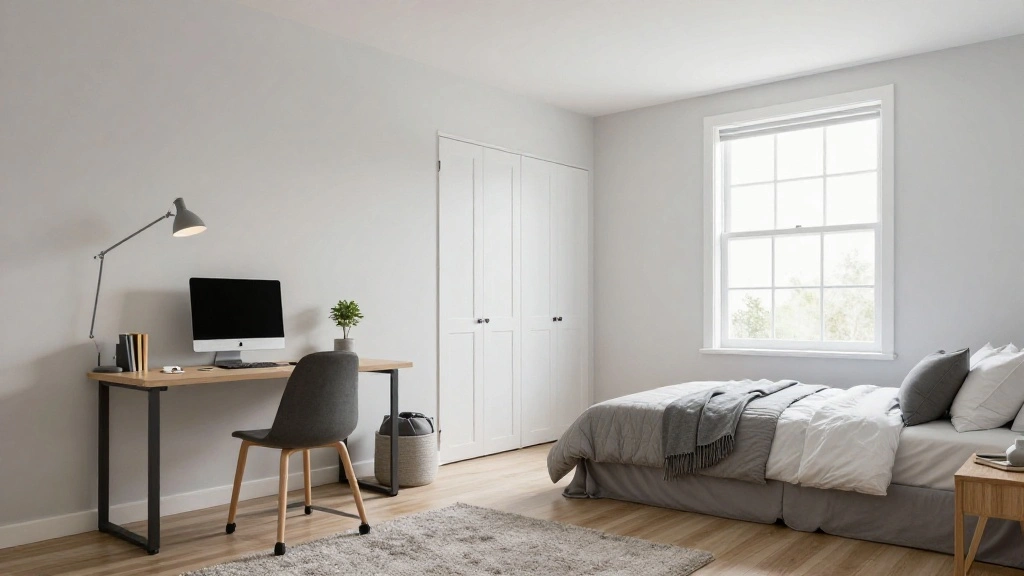
Step 1: Choose the Right Location

Begin by identifying the best area in your room for your study and sleep space. Consider the following:
- Look for a quiet corner with minimal distractions.
- Ensure there is adequate natural light during the day.
- Check for proximity to power outlets for your devices.
Warning: Avoid placing your study area near your bed to minimize distractions.
Why this matters: An effective location significantly improves focus and sleep quality.
Time estimate: 15-20 minutes
Step 1: Choose the Right Location
Editor’s Choice
LED Desk Lamp with USB Ports,Touch Desk Lamps for Home Office with 5 Col…

Marsail Ergonomic Office Chair: Office Desk Chair with High Back Mesh an…

Sony ZX Series Wired On-Ear Headphones, Black MDR-ZX110
Step 2: Clear Out Clutter
Declutter the chosen areas to create a clean slate. Follow these steps:
- Remove unnecessary items from the desk and bed.
- Sort items into ‘keep,’ ‘donate,’ and ‘discard’ piles.
- Organize your belongings into storage bins or shelves.
Pro Tip: Use clear bins to easily see what’s inside.
Why this matters: A tidy space fosters a calm mind, enhancing concentration and relaxation.
Time estimate: 30-40 minutes
Step 2: Clear Out Clutter
Editor’s Choice

8 Pack Extra Large Heavy Duty Moving Bags, Clear Storage Bins with Lids,…
Step 3: Set Up the Study Area
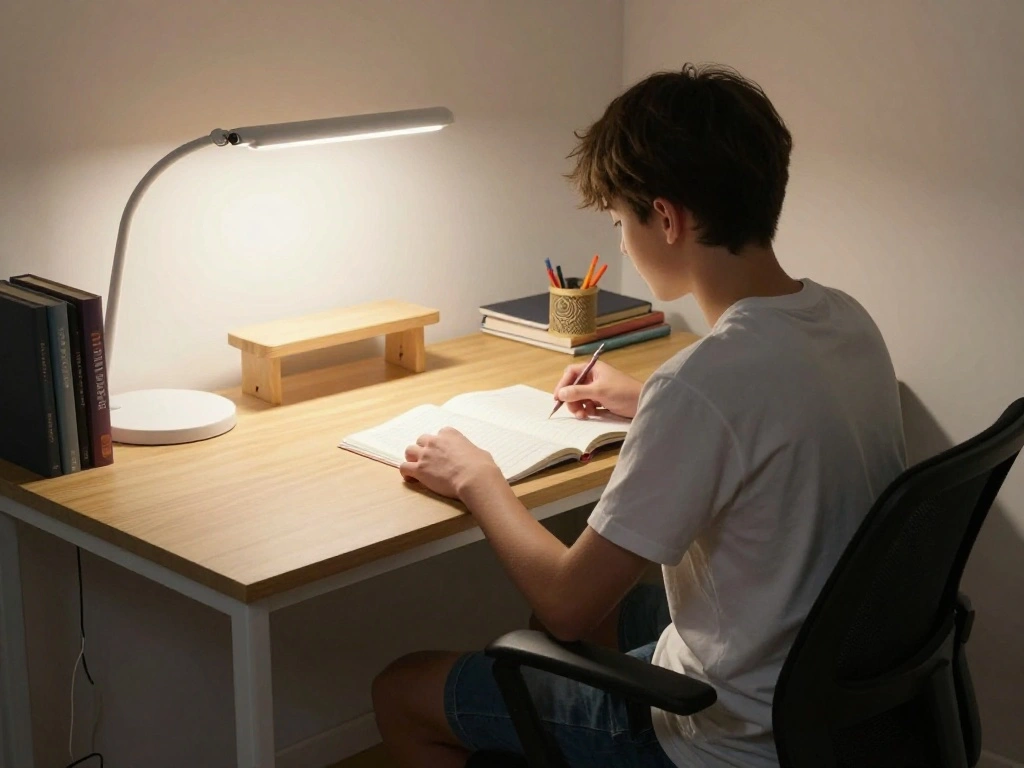
Now it’s time to create an inviting study space. Follow these steps:
- Position your desk against a wall or in a well-lit area.
- Add a comfortable chair that supports good posture.
- Place a desk lamp for additional lighting.
Warning: Ensure your desk is at a height that allows your arms to rest comfortably.
Why this matters: A dedicated study area promotes focus and efficiency.
Time estimate: 30 minutes
Step 3: Set Up the Study Area
Editor’s Choice

Veken 55 Inch Large Electric Standing Desk,Sit to Stand Up, Heights Adju…
Airlonv LED Desk Lamp for Office Home, Eye-Caring Desk Light with Steple…
Step 4: Create a Comfortable Sleep Space

Your sleep space should be cozy and inviting. Do the following:
- Make your bed with clean, comfortable bedding.
- Add pillows and a blanket that suit your comfort preferences.
- Consider using blackout curtains to control light.
Pro Tip: Keep your sleep area free of electronic devices to enhance sleep quality.
Why this matters: A comforting sleep environment is crucial for restorative rest.
Time estimate: 30 minutes
Step 4: Create a Comfortable Sleep Space
Editor’s Choice

Queen Size 4 Piece Sheet Set – Comfy Breathable & Cooling Sheets – Hotel…
Step 5: Organize Study Materials

Organizing your study materials will keep you focused. Follow these steps:
- Gather notebooks, textbooks, and stationery.
- Use storage solutions like bins or drawer organizers.
- Label bins for easy access.
Warning: Avoid overcrowding your desk with materials; keep only essentials within reach.
Why this matters: An organized study area minimizes distractions and enhances productivity.
Time estimate: 20-30 minutes
Step 5: Organize Study Materials
Editor’s Choice

Amazon Basics Mesh Pen Holder and Desktop Desk Organizer, Office Caddy S…
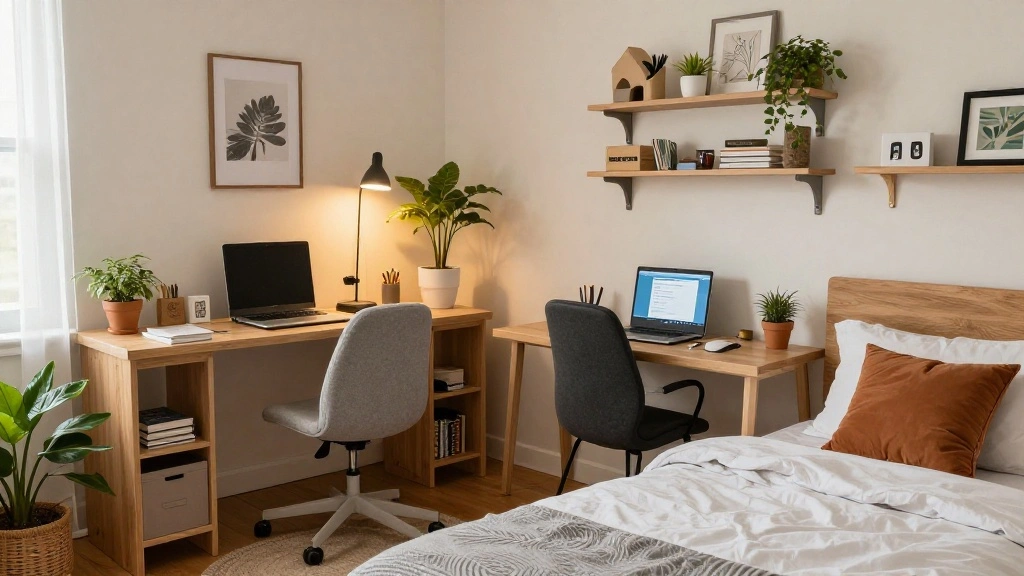
Step 6: Personalize Your Space

Make your study and sleep areas feel uniquely yours. Follow these steps:
- Add personal decor, such as photos or posters.
- Incorporate plants to enhance the atmosphere.
- Choose a color scheme that makes you feel relaxed and inspired.
Pro Tip: Use wall art to reflect your interests and passions.
Why this matters: Personal touches help create a space where you feel comfortable and motivated.
Time estimate: 30 minutes
Step 6: Personalize Your Space
Editor’s Choice

Artificial Plants with Seagrass Handwoven Planters, Farmhouse Indoor Gre…
Step 7: Establish a Routine
Finally, establish a daily routine to maximize your new space. Follow these steps:
- Set specific study times to build consistency.
- Create a bedtime routine to signal your body it’s time to sleep.
- Limit distractions during study times, like phone notifications.
Warning: Avoid studying in bed, as it can lead to poor sleep habits.
Why this matters: A routine helps reinforce the purpose of each area, leading to better focus and rest.
Time estimate: 20 minutes
Step 7: Establish a Routine
Editor’s Choice

Night Light Clock, Dimmable+3 Light Colors+Timer Nightlight Timing Light…

Soundcore by Anker Q20i Hybrid Active Noise Cancelling Headphones, Wirel…

DLisiting White Computer Desk with Hutch & Drawers – 47 Inch Modern Stud…
Pro Tips
- Tip 1: Use noise-canceling headphones while studying to minimize distractions.
- Tip 2: Incorporate a whiteboard or corkboard for reminders and schedules.
- Tip 3: Keep a water bottle nearby to stay hydrated during study sessions.
- Tip 4: Experiment with different lighting settings to find what helps you concentrate best.
- Tip 5: Set boundaries with family members regarding your study time to enhance focus.
Pro Tips
Editor’s Choice

Sony WH-CH720N Noise Canceling Wireless Headphones Bluetooth Over The Ea…
Airlonv LED Desk Lamp for Office Home, Eye-Caring Desk Light with Steple…
Common Mistakes to Avoid
- Warning: Don’t clutter your study area with too many decorations; it can be distracting.
- Warning: Avoid using your bed as a study space, as it can interfere with sleep quality.
- Warning: Don’t ignore the importance of good lighting; it can affect your mood and productivity.
Common Mistakes to Avoid
Editor’s Choice

Lepro LED Desk Lamp, Metal Desk Light 9.5W 800lm, Best Task Lamp, 5 Colo…

Ergonomic Office Chair,Mesh Office Chair with Lumbar Support,Mid Back De…
Troubleshooting Section
- Problem: I can’t focus in my study area.
Solution: Minimize distractions, adjust lighting, or try studying in a different spot. - Problem: My sleep area feels uncomfortable.
Solution: Reassess your bedding and pillows; consider adding a mattress topper for extra comfort. - Problem: I have too much clutter again.
Solution: Schedule a weekly decluttering session to keep your space organized.
Troubleshooting Section
Editor’s Choice

LIONVISON LED Desk Lamp for Home Office: Eye-Caring Clamp & Stand Double…

StorageWorks Fabric Storage Bins, Small Storage Bins with PU Handle, Dec…
Niagara Sleep Solution Ultra Soft Queen Size Mattress Topper – Rayon Der…
Variations/Alternative Methods
- Use a foldable desk if space is limited; it can be stored away when not in use.
- Try a standing desk for studying; it may improve focus and energy levels.
- Incorporate a hammock chair for a fun and comfortable study alternative.
Variations/Alternative Methods
Editor’s Choice

Coleman Comfortsmart Portable Suspension Chair, Ultra-Comfortable Outdoo…

ErGear Height Adjustable Electric Standing Desk, 48 x 24 Inches Sit Stan…

Huuger Folding Desk for Small Spaces, 31.5 Inch Foldable Computer Table,…
FAQs
- What if I don’t have enough room for a desk?
You can use a small table or even a lap desk for studying. - How long should I study each day?
Aim for 1-2 hours of focused study time, depending on your workload. - Is it safe to study in bed?
It’s not recommended as it can lead to poor sleep habits; use a designated desk instead.
FAQs
Editor’s Choice
Airlonv LED Desk Lamp for Office Home, Eye-Caring Desk Light with Steple…

ZEAPTAC Laptop Bed Desk, Foldable Lap Desk, Portable Lap Table, Laptop S…
Conclusion
Congratulations! You’ve successfully created a study and sleep space that works for you. This organized environment will help you focus on your studies and enjoy restful sleep. Moving forward, remember to maintain the organization and personalize your space as your interests evolve.
Consider exploring additional resources on study techniques or sleep hygiene to further enhance your productivity and well-being. Now, enjoy your newly transformed bedroom!