
As teenagers transition into adulthood, their environments should reflect this change. A bedroom that feels too juvenile can hinder their sense of independence and self-identity. If your teen’s room is still decked out in cartoon posters and mismatched furniture, it’s time for a transformation. By updating their space, you not only give them a sense of ownership but also create a more inviting atmosphere for studying, relaxing, and socializing.
In this guide, you will learn how to make a teen bedroom feel more grown-up by incorporating sophisticated decor, practical organization solutions, and functional furniture. You’ll accomplish a space that reflects their personality while still being mature and stylish. By the end of this guide, your teen will have a room they can be proud of, which is conducive to both work and leisure.
This guide is aimed at beginners and will take about 2-3 hours to complete, depending on the size of the room and the changes made. Let’s get started on creating a space that feels more grown-up!
TL;DR Summary
- Update furniture to be more modern and functional.
- Incorporate a neutral color palette, accented with personalized decor.
- Organize the space effectively to improve functionality.
- Introduce stylish lighting for ambiance.
TL;DR Summary
Editor’s Choice

MUXHOMO 7 Pieces Queen Comforter Set, Seersucker Bed in a Bag Queen Size…

WORLD WIN Floor Lamp, 61” Smart RGB LED Corner Lamp with Music Sync and…

JOONEE Nightstand,Modern Bedside Table with Storage Drawer and Open Wood…
Prerequisites/Materials Needed
- Paint (neutral colors like gray, beige, or soft pastels)
- New bedding (comforter and pillows)
- Wall decor (framed art or posters)
- Functional furniture (desk, chair, or shelving)
- Storage solutions (baskets, organizers)
- Lighting fixtures (desk lamp or floor lamp)
Prerequisites/Materials Needed
Editor’s Choice

Lepro LED Desk Lamp, Metal Desk Light 9.5W 800lm, Best Task Lamp, 5 Colo…

Rust-Oleum 267335 Painter’s Touch Latex Acrylic Paint, Satin Stone Gray …

Menghomeus Aqua Comforter Set Twin Size Metallic Teal and Silver Bed Com…
Skill Level & Time Estimate
Skill Level: beginner
Total Time Estimate: 2-3 hours
Skill Level & Time Estimate
Editor’s Choice

HYMOKEGE Queen Comforter Set Seersucker 7 Pieces, All Season Luxury Bed …

Framed Neutral Abstract Wall Art for Living Room, Set of 6 Minimalist Bl…

Marbrasse Pen Organizer with 2 Drawer, Multi-Functional Pencil Holder fo…
Step 1: Declutter the Room

Start the transformation by clearing out unnecessary items. A cluttered space can feel chaotic and less inviting.
- Remove everything from the surfaces: desk, nightstand, and floor.
- Sort items into three categories: keep, donate, and throw away.
- Organize the ‘keep’ items neatly into designated spaces.
Pro Tip: Use storage boxes to manage small items, keeping surfaces clear.
Why this matters: A clean slate allows you to visualize the changes needed and provides a fresh start. This step should take about 30-45 minutes.
Step 1: Declutter the Room
Editor’s Choice

Cozy Essential Vacuum Storage Bags, 80% Compression Vacuum Seal Space Sa…

WALI Desk File Organizer, 4 Tier Desktop Paper Letter Tray Organizer wit…
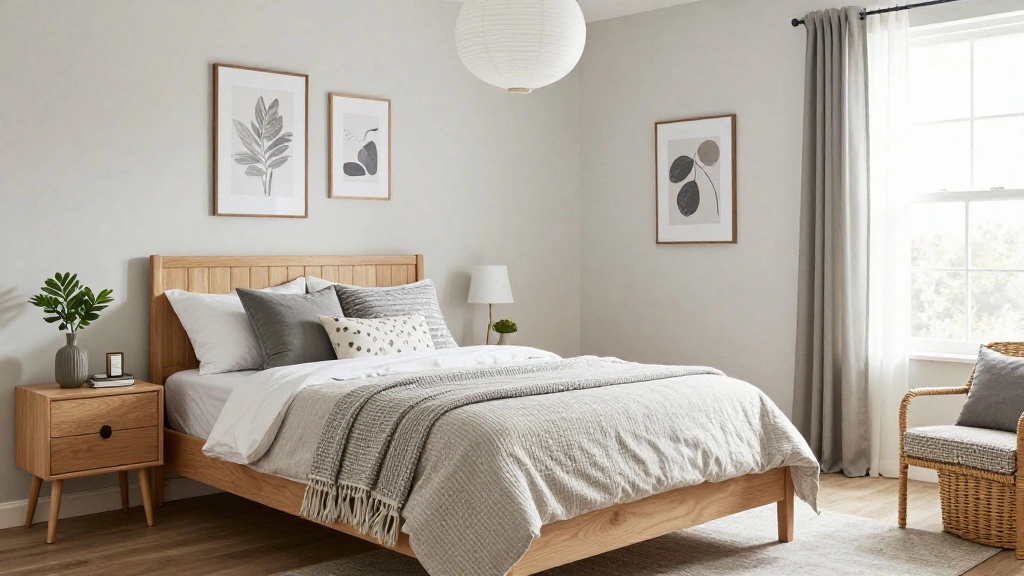
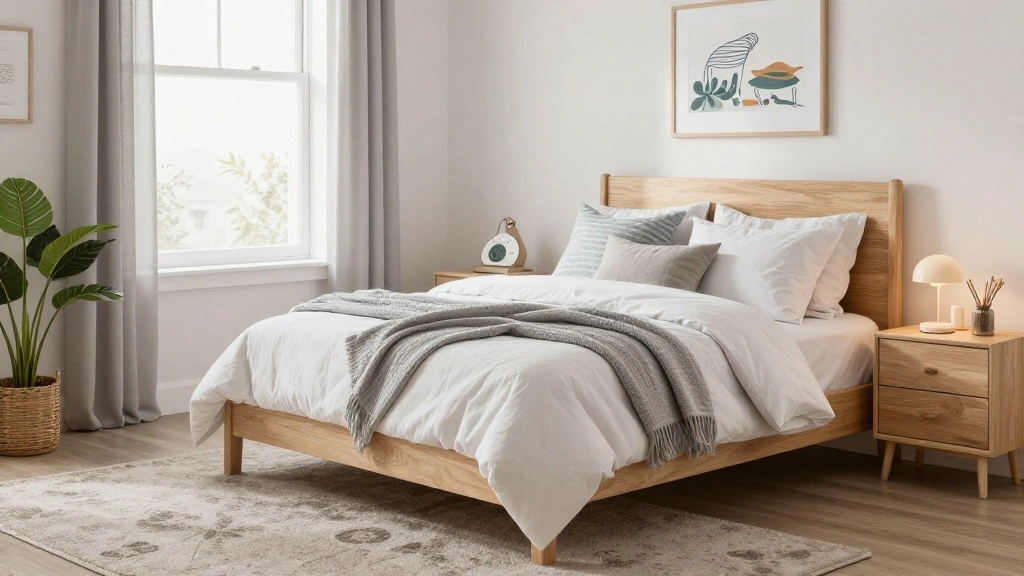
Step 2: Choose a Neutral Color Palette

Selecting a neutral color palette sets a mature tone for the room. Neutral colors create a calming atmosphere and can be easily accented with personal touches.
- Choose a primary color for the walls (consider light gray, beige, or soft pastels).
- Pick complementary colors for bedding and decor.
- Purchase paint and supplies if painting.
Warning: Ensure you ventilate the room well if using paint. This step may take around 1-2 hours, depending on painting time.
Why this matters: A neutral palette provides flexibility for future decor changes and enhances the room’s overall appeal.
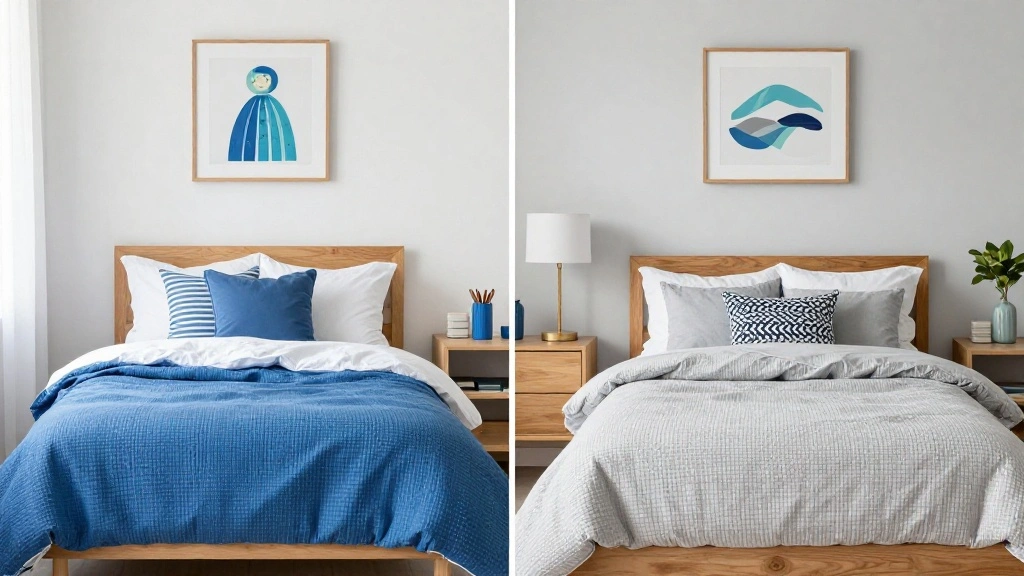
Step 3: Update Bedding and Textiles

Investing in new bedding can dramatically change the room’s vibe. Opt for simple patterns or solid colors that align with the chosen palette.
- Remove old bedding and curtains.
- Purchase new bedding that fits the bed size and complements the color scheme.
- Consider adding decorative pillows or a throw blanket for extra comfort.
Pro Tip: Choose fabrics that are easy to maintain and clean.
Why this matters: Quality bedding can enhance comfort and make the room feel more sophisticated. This step should take about 30 minutes.
Step 3: Update Bedding and Textiles
Editor’s Choice

MIULEE Pack of 4 Couch Throw Pillow Covers 18×18 Inch Neutral Soft Decor…

Bedsure GentleSoft White Throw Blanket for Couch – Graduation Gifts Teac…
Step 4: Incorporate Functional Furniture
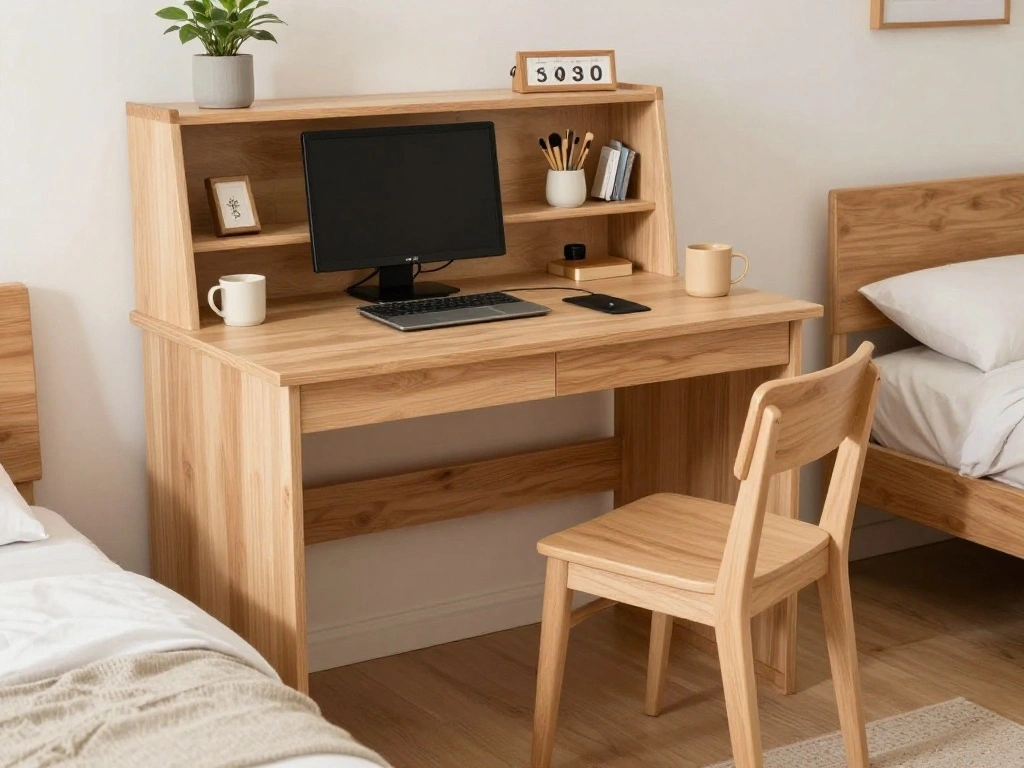
Modern furniture can provide both style and utility. Choose pieces that reflect maturity while fulfilling needs.
- Identify essential furniture: desk, chair, and storage options.
- Visit a furniture store or browse online to find modern, functional options.
- Assemble and arrange the new furniture in the room, ensuring good flow and accessibility.
Warning: Be cautious when assembling furniture to avoid injuries. This step may take 1-2 hours.
Why this matters: Functional furniture promotes productivity and creates an organized environment.
Step 4: Incorporate Functional Furniture
Editor’s Choice

NEO Chair Ergonomic Leather Office Desk Chair with Fixed Armrests Mid Ba…
Step 5: Personalize with Wall Decor
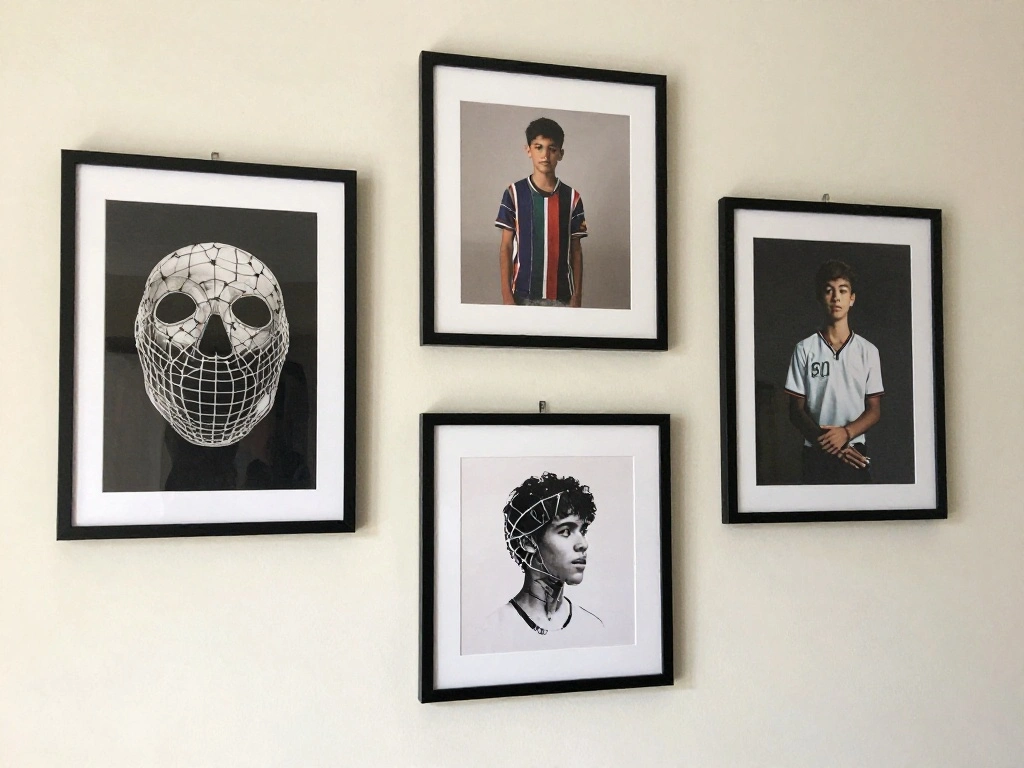
Wall decor adds character to the space and reflects your teen’s interests. Choose art that resonates with their personality.
- Select framed prints, posters, or wall art that complements the room’s color scheme.
- Arrange the decor for visual balance on the walls.
- Use removable adhesive hooks or nails for easy installation.
Pro Tip: Create a gallery wall for a personal touch. This step should take about 30 minutes.
Why this matters: Personal touches make the space feel uniquely theirs, fostering a sense of ownership.
Step 5: Personalize with Wall Decor
Editor’s Choice

184 Pieces Picture Hanging Kit, 20lb, 30lb, and 50lb Picture Hangers, Me…

HAUS AND HUES Botanical Plant Wall Art Prints – Set of 4 Plant Decor Pri…

ANERZA 16 PCS Gold Framed Vintage Eclectic Wall Art Decor, William Morri…
Step 6: Optimize Storage Solutions

Effective storage solutions keep the room tidy and organized. Having designated spaces for everything reduces clutter.
- Identify areas that need storage, like under the bed or in the closet.
- Purchase baskets, bins, or organizers to hold items.
- Label containers if needed for easy identification.
Warning: Avoid overstuffing storage containers to maintain accessibility. This step may take 30-45 minutes.
Why this matters: Proper organization promotes a functional space where everything has a place.
Step 6: Optimize Storage Solutions
Editor’s Choice

Budding Joy 90L Under Bed Storage Containers, Closet Organizers and Stor…

5 Pack Woven Storage Baskets for Shelves, Decorative Basket Organizer St…
Step 7: Introduce Stylish Lighting
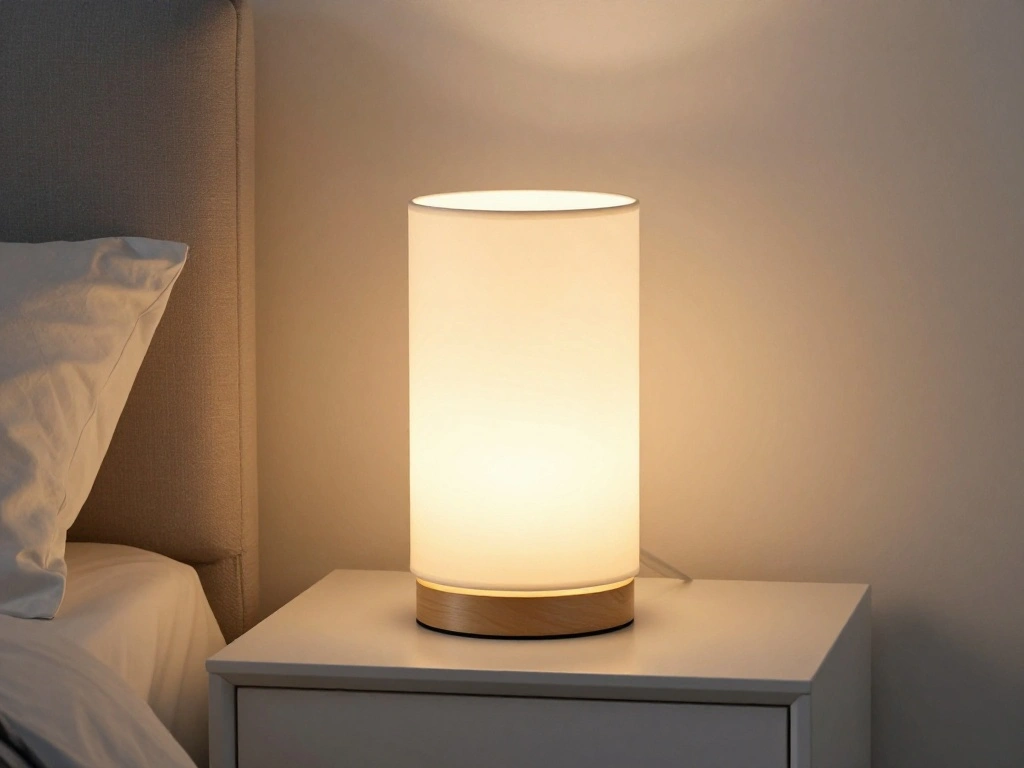
The right lighting can enhance the ambiance of the room. A mix of ambient and task lighting is ideal.
- Identify areas needing better lighting, such as the desk or bedside.
- Purchase stylish lamps or string lights that fit the room’s decor.
- Arrange lighting fixtures to create a cozy atmosphere.
Pro Tip: Use dimmable lights for versatility in mood settings. This step may take 30 minutes.
Why this matters: Good lighting sets the tone and makes the room more inviting.
Step 8: Create a Study Zone

A dedicated study area helps promote focus and productivity. Organizing this space is crucial for effective studying.
- Designate a specific area in the room for studying.
- Ensure the desk is free of distractions and equipped with necessary supplies.
- Personalize the study zone with motivational quotes or photos for inspiration.
Warning: Avoid overcrowding the study area to maintain focus. This step should take about 30 minutes.
Why this matters: A well-organized study zone fosters a productive mindset.
Step 8: Create a Study Zone
Editor’s Choice

Supwhd Positive Affirmations Wall Decor, Inspirational Add Up to Big Res…
Step 9: Final Touches and Clean-Up
After all the changes, it’s time to add finishing touches and clean up the space. This final step ties everything together.
- Review the room for any last adjustments needed.
- Clean surfaces, including dusting and vacuuming.
- Add any final decorative items like plants or candles.
Pro Tip: Keep the space clean regularly to maintain its freshness. This step should take around 30 minutes.
Why this matters: A clean, polished finish makes all the effort worthwhile and creates a welcoming environment.
Step 9: Final Touches and Clean-Up
Editor’s Choice

Candles Gift Set for Women, 4 Pack Scented Candles with 8% Essential Oil…

KARDV Cordless Vacuum Cleaner, 500W/40Kpa Vacuum Cleaners for Home, 60Mi…
Pro Tips
- Choose Multi-Functional Furniture: Opt for pieces that serve more than one purpose, like a bed with storage drawers.
- Incorporate Plants: Adding greenery can enhance air quality and add a refreshing touch.
- Utilize Vertical Space: Install shelves to maximize storage without taking up floor space.
- Change Hardware: Updating drawer pulls or knobs can give older furniture a fresh look.
- Keep it Minimal: Avoid overcrowding with decor; less is often more.
Pro Tips
Editor’s Choice

Easy to Grow Live Houseplants (6 Pack), Deluxe Collection of Assorted Ai…
Common Mistakes to Avoid
Warning: Don’t rush the process; take your time to make thoughtful choices. Rushed decisions can lead to buyer’s remorse. Always measure your space before purchasing new furniture to ensure it fits well. Avoid using too many colors; sticking to a cohesive palette creates a more mature look.
Common Mistakes to Avoid
Editor’s Choice

Sasttie Queen Comforter Set, 7-Piece Bed in a Bag, Pintuck Bedding Sets …

S-MANTIS Vintage Wall Sculpture, Antique Pediment, Hallway Wall Art, Han…

Furinno Jaya Book Shelf, 5-Tier Bookshelf, Bookcase with Adjustable Shel…
Troubleshooting Section
Problem: The room feels cramped after adding new furniture.
Solution: Reevaluate the layout; consider moving larger pieces to different walls or opting for smaller furniture.
Problem: The decor feels mismatched.
Solution: Revisit your color palette and replace or repaint items to create harmony.
Problem: The lighting is too harsh.
Solution: Replace bright bulbs with softer, warmer alternatives or add lamps for layered lighting.
Troubleshooting Section
Editor’s Choice

TJOY 6 Pack A19 LED Light Bulbs, 60 Watt Equivalent LED Bulb, Soft Warm …
Variations/Alternative Methods
Consider using removable wallpaper for a quick and easy update or painting an accent wall for a pop of color. Each method allows for personal expression without a permanent commitment.
Variations/Alternative Methods
Editor’s Choice

Zinsser 02774 PERMA-WHITE Mold & Mildew Proof Interior Paint, Quart, Egg…

15.7″ X 118″ Black Silk Wallpaper Embossed Self Adhesive Peel and Stick …

Ypxzzj Framed Banksy Graffiti Astronaut Canvas Wall Art Pop Spaceman Pos…
FAQs
What if I don’t have a budget for new furniture? Look for second-hand options or consider DIY projects to refresh your current pieces.
How long should I expect the changes to last? With proper care, a well-decorated room can last for years without needing significant updates.
Is it safe to paint my room myself? Yes, as long as you follow safety guidelines and use non-toxic paint.
What if I don’t know my style? Browse home decor websites or inspire yourself with Pinterest boards to discover what resonates with you.
Can I do this alone? While it’s possible, having a friend or family member can make the process more enjoyable and efficient.
FAQs
Editor’s Choice

Vintage corners (Set of 4pcs), vintage furniture upcycling, decorative r…

Framed Boho Wall Art Set of 4 for Wooded Minimalist Botanical Print Wall…

EVOLVE Paint & Primer: Environment-friendly, Low Sheen with One-coat Cov…
Conclusion
Congratulations on transforming your teen’s bedroom into a more mature and inviting space! You’ve not only updated the aesthetics but also empowered your teen by creating an environment that reflects their evolving identity. Think of this as a new chapter – maintaining this room will make it a sanctuary for years to come.
As a next step, encourage your teen to personalize their space further by adding elements like photos or artwork that resonates with them. Share your journey on social media or with friends to inspire others!