
Creating a cozy kids’ bedroom on a budget can feel daunting, especially when you want to combine style with functionality. Many parents struggle with limited resources while trying to create a space that sparks joy and imagination for their little ones. Without careful planning, you might end up overspending or creating a cluttered environment that lacks warmth.
This guide will help you transform your child’s room into a cozy haven without breaking the bank. You’ll learn how to choose themes, repurpose items, and incorporate DIY projects to make the space feel personal and inviting. By the end of this guide, you will have a stylish and snug kids’ bedroom that reflects your child’s personality.
This guide is meant for beginners and will take approximately 2-3 hours to complete. We’ll walk you through each step, offering practical tips and creative ideas to make decorating enjoyable and fulfilling. Let’s dive into the fun of creating a cozy kids’ bedroom!
TL;DR Summary
- Transform your child’s room into a cozy haven without spending a fortune.
- Learn how to choose a theme, repurpose items, and incorporate DIY projects.
- Follow a step-by-step guide designed for beginners, taking around 2-3 hours.
- End up with a personalized space that reflects your child’s personality and creativity.
TL;DR Summary
Editor’s Choice

Wake In Cloud – Shabby Chic Quilt Set, Floral Coquette Cottagecore Farmh…

Hula Home Stained Glass Mandala Art Kit – DIY Window Clings with Markers…

Black Girl Wall Art Set of 9,African American Woman Wall Decor Paintings…
Prerequisites/Materials Needed
- Furniture:
- Bed (twin or full)
- Dresser or storage unit
- Decor:
- Wall paint or wallpaper
- Wall art or posters
- Curtains or blinds
- Bedding:
- Bed sheets
- Pillows
- Comforter or duvet
- DIY Supplies:
- Paint brushes
- Craft paper
- Scissors
- Glue
- Accessories:
- Stuffed animals
- Bookshelves
- Toys
Skill Level & Time Estimate
Skill Level: beginner
Total time estimate: 2-3 hours
Breakdown:
- Planning and theme selection: 30 minutes
- Painting and wall decor: 1 hour
- Furniture arrangement: 30 minutes
- Accessorizing and final touches: 1 hour
Skill Level & Time Estimate
Editor’s Choice

ORGIDOL 8 Pack Colorful Storage Bins with Lids Stackable Storage Contain…
Boho Flower Wall Decals Bohemian Wildflower Grass Wall Stickers Peel and…

Twin Kids Comforter Set – 5 Pieces Twin Bedding Sets for Boys, Glow in T…
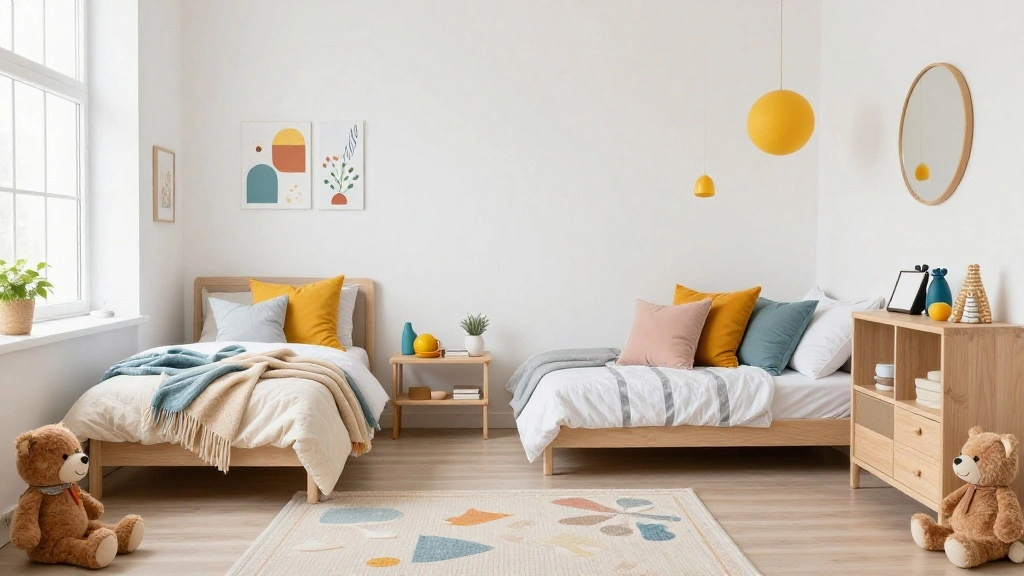
Step 1: Choose a Theme

Start by selecting a theme for the bedroom that reflects your child’s interests. A cohesive theme can enhance the overall feel of the room. Follow these steps:
- Discuss with your child their favorite colors, characters, or hobbies.
- Research different themes (e.g., nature, space, princesses) online for inspiration.
- Choose a theme that is versatile enough to grow with your child.
Pro Tip: Use Pinterest or Instagram for visual inspiration to help narrow down your choices.
Why this matters: A well-defined theme creates a cohesive look that makes the room feel inviting and special.
Estimated time for this step: 30 minutes.
Step 1: Choose a Theme
Editor’s Choice

Colorful Abstract Shape Wall Stickers, Lovely Smile Clouds Rainbow Irreg…

Moon Pillow, Decorative Throw Pillows with Soft Faux Rabbit for Bed Couc…
Twin Kids Comforter Set – 5 Pieces Twin Bedding Sets for Boys, Glow in T…
Step 2: Clear the Space
Before you start decorating, clear the room of any unnecessary items. A clean slate makes it easier to visualize your new design. To do this:
- Remove all furniture and decor.
- Sort items into keep, donate, and discard piles.
- Clean the floors and surfaces to prepare for painting and decorating.
Warning: Ensure you have enough space to work and avoid cluttering the new layout with old items.
Why this matters: Clearing the space allows you to see the potential of the room and helps you make better design decisions.
Estimated time for this step: 30 minutes.
Step 2: Clear the Space
Editor’s Choice

Gowee Large Toy Storage Box with Lid, Sturdy Toys Storage Chest Bin Orga…

Nicpro 68PCS Acrylic Paint Canvas Set for Adults, Art Painting Supplies …

Stardrops The Pink Stuff Miracle Cleaning Bundle – Multi-Purpose Paste…
Step 3: Paint the Walls
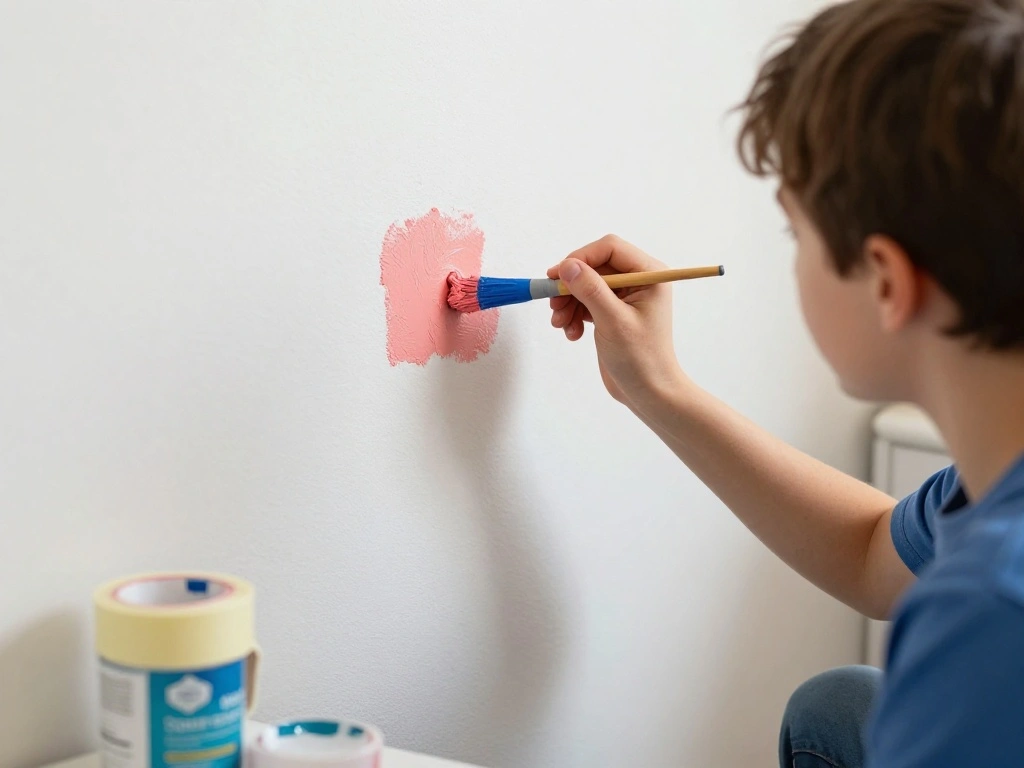
Painting the walls can instantly refresh the room and bring your chosen theme to life. Here’s how to do it:
- Choose a paint color that aligns with your theme.
- Prepare the room by covering furniture and floors with drop cloths.
- Use painter’s tape to protect trim and edges.
- Apply a primer if necessary, followed by 1-2 coats of paint.
Pro Tip: Opt for washable paint finishes to make future cleaning easier.
Why this matters: A fresh coat of paint serves as the foundation for your room’s aesthetic and can set the mood.
Estimated time for this step: 1 hour.
Step 3: Paint the Walls
Editor’s Choice

Canvas Painters Drop Cloth (Size 9 x 12 Feet – Pack of 2) – Pure Cotton …

Cra-Z-Art Washable Classic Paint Bulk Pack 8ct, Assorted Colors 4oz each…

4 Rolls Premium Painters Tape, Blue Tape, Masking Tape, Paint Tape for M…
Step 4: Arrange Furniture
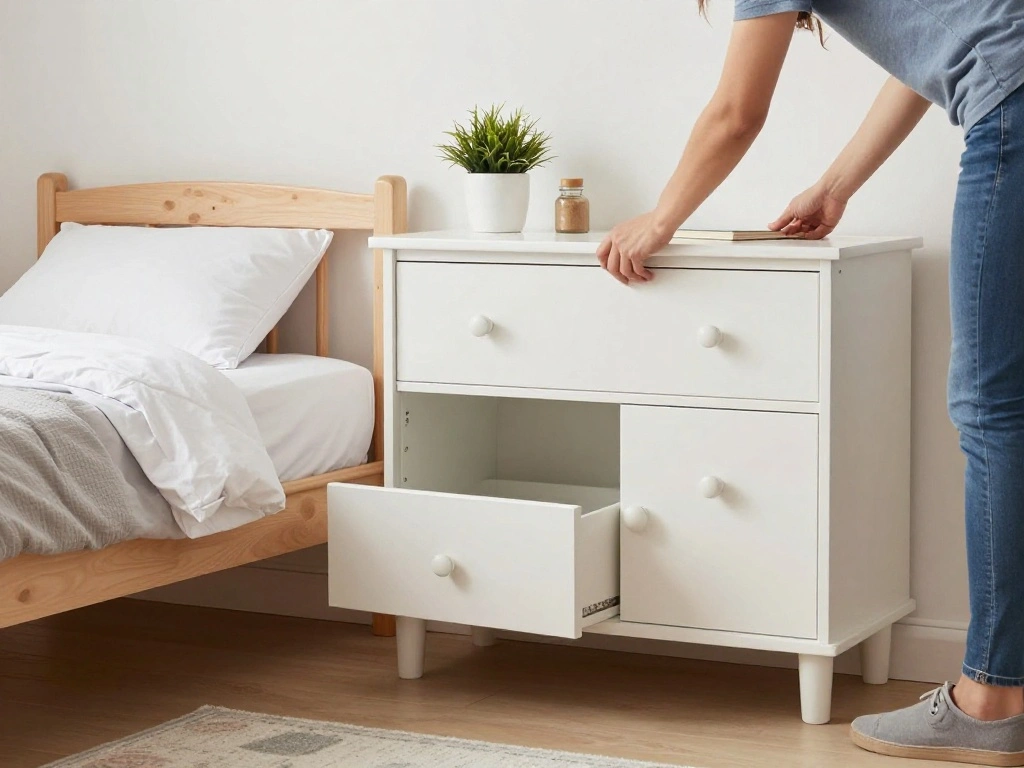
Once the paint dries, it’s time to arrange the furniture in a way that maximizes space and functionality. Follow these steps:
- Position the bed as the focal point, ideally against a wall.
- Arrange other furniture (dressers, bookshelves) to create flow.
- Ensure there is adequate space for play and movement.
Pro Tip: Use a floor plan app to visualize different arrangements before moving heavy furniture.
Why this matters: An organized layout promotes a sense of calm and makes the room more enjoyable for your child.
Estimated time for this step: 30 minutes.
Step 5: Add Bedding and Textiles
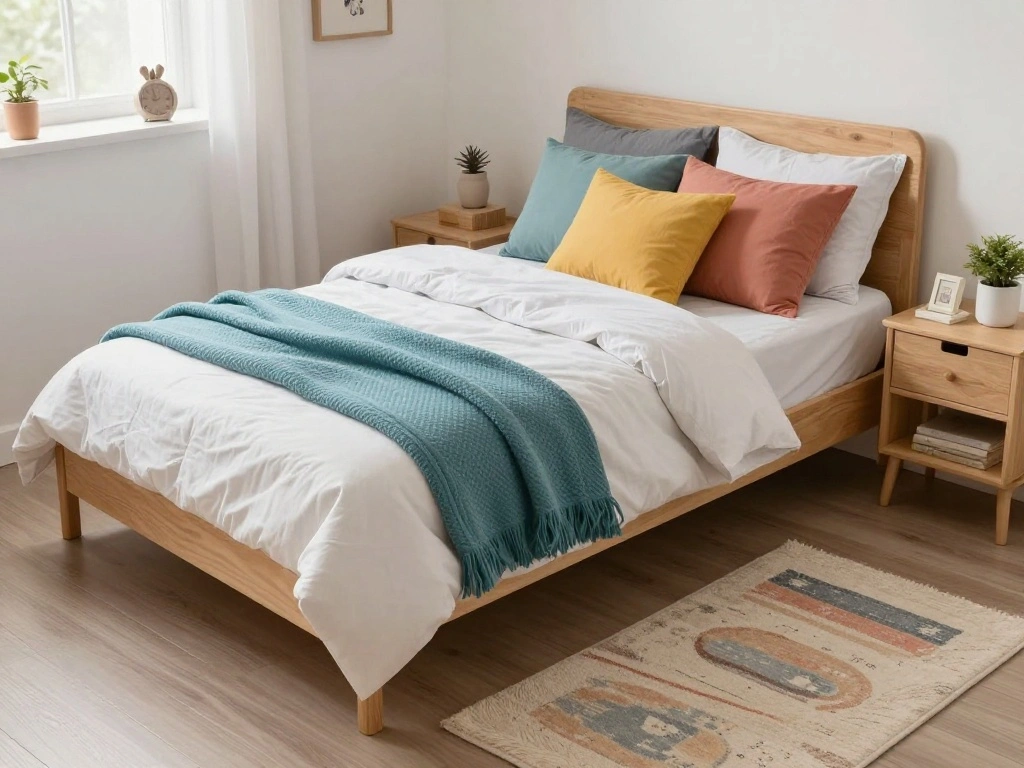
Bedding and textiles can add warmth and personality to the room. Here’s how to choose and arrange them:
- Select bed sheets and a comforter that match the theme.
- Add decorative pillows for style and comfort.
- Incorporate rugs to define play areas and add coziness.
Pro Tip: Layer textures (like adding a knitted throw) to create a more inviting look.
Why this matters: Textiles not only enhance the aesthetic but also contribute to the room’s comfort and functionality.
Estimated time for this step: 30 minutes.
Step 5: Add Bedding and Textiles
Editor’s Choice

Sage Green Decorative Throw Pillows Flower Daisy Shaped Pillow 16″ Soft …

OLANLY Area Rugs for Living Room Bedroom, Machine Washable 4×5.9 ft Soft…

JSD Green Forest Animals Kids Comforter Set Twin Size, 2 Piece Woodland …
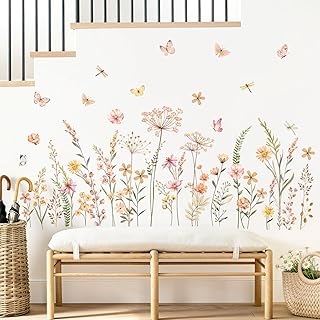
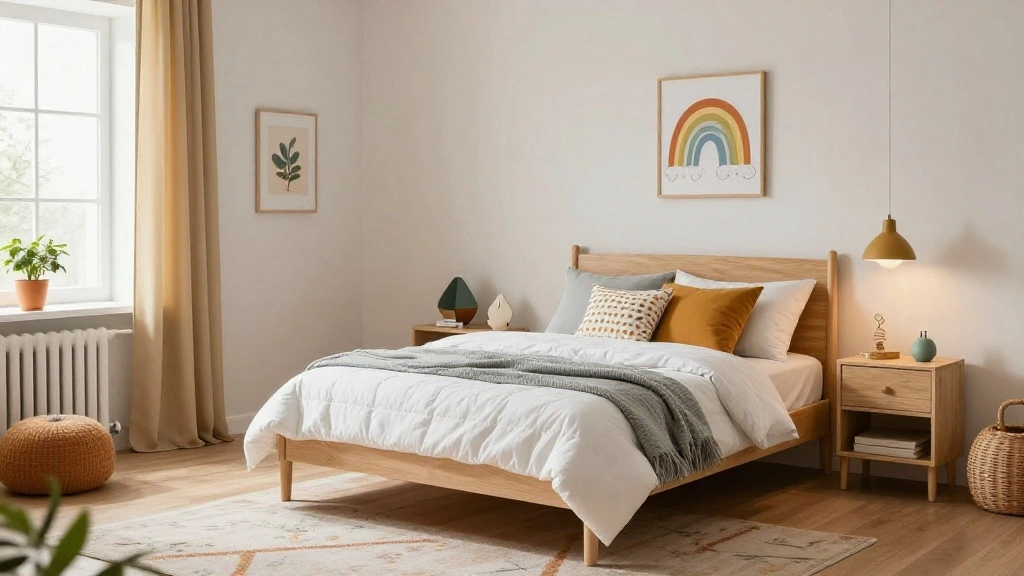
Step 6: Personalize the Walls

Personal touches can make the room feel unique and special for your child. To personalize the walls:
- Hang artwork or posters that align with the chosen theme.
- Consider creating a DIY gallery wall with your child’s artwork.
- Add wall decals or removable stickers for easy customization.
Pro Tip: Use washi tape to hang artwork; it’s damage-free and easily removable.
Why this matters: Personalized decor allows children to express themselves and feel more connected to their space.
Estimated time for this step: 30 minutes.
Step 6: Personalize the Walls
Editor’s Choice

Guirnd 12PCS Colored Masking Tape, Kids Art Supplies, DIY Craft Tape, Co…

Antique Frame for 24×30 Canvas Paintings, No Front & Backing, 2.6″ Wide …
Step 7: Incorporate Storage Solutions

Storage is essential for maintaining a tidy and functional kids’ room. Follow these steps to incorporate effective storage:
- Choose storage solutions that match the room’s decor (like colorful bins or shelves).
- Designate specific areas for toys, books, and clothes.
- Use under-bed storage for out-of-season items or less frequently used toys.
Pro Tip: Label bins and shelves to help kids know where to put things away.
Why this matters: Adequate storage keeps the room organized and makes it easier for your child to clean up.
Estimated time for this step: 30 minutes.
Step 7: Incorporate Storage Solutions
Editor’s Choice

Budding Joy 90L Under Bed Storage Containers, Closet Organizers and Stor…

Nelko Label Maker Machine with Tape, P21 Bluetooth Label Printer, Wirele…
Gowee Large Toy Storage Box with Lid, Sturdy Toys Storage Chest Bin Orga…
Step 8: Add Finishing Touches

Finishing touches can elevate the overall look of the room. Here’s how to complete the decor:
- Add curtains or blinds that complement the theme.
- Incorporate soft lighting, like fairy lights or lamps, for a cozy vibe.
- Place stuffed animals or decorative pillows in strategic spots for visual interest.
Pro Tip: Use battery-operated fairy lights for a magical touch without needing outlets.
Why this matters: Finishing touches create a cohesive feel and enhance the room’s ambiance.
Estimated time for this step: 30 minutes.
Step 8: Add Finishing Touches
Editor’s Choice

Cute Decorative Lights Fairy String Light Horse Gifts for Women Novelty …

Black Woman Curtains African American Black Girl Blackout Curtain 4263in…

YOUR MOON Fluffy Support Bed Pillow Queen Size, Super Soft Premium Down-…
Step 9: Celebrate the Transformation
With everything in place, it’s time to celebrate the transformation! To enjoy the new space:
- Invite your child to explore their newly decorated bedroom.
- Encourage them to arrange their toys and books in their new storage.
- Take photos to document the change and share the joy!
Pro Tip: Plan a small celebration (like a movie night) in the new room to make it feel even more special.
Why this matters: Celebrating the completion allows your child to appreciate their new space and feel involved in the creation process.
Estimated time for this step: 30 minutes.
Step 9: Celebrate the Transformation
Editor’s Choice

Colorful Polka Dot Wall Decals Watercolor Dots Wall Sticker for Kids Bab…

Sorbus 11 Inch Fabric Storage Cubes – Sturdy Collapsible Bins With Handl…

MUGD Soft Blankets Fleece Soft Fuzzy Throw Blanket Kids Warm Throw Blank…
Pro Tips
- Shop Second-Hand: Visit thrift stores for unique decor items that can be easily refreshed with paint.
- DIY Decor: Get creative with DIY projects like custom wall art or handmade cushions.
- Rotate Decor: Change out seasonal or holiday decor to keep the room feeling fresh.
- Involve Your Child: Let them help with choosing colors and arranging items to foster a sense of ownership.
- Budget Planning: Set a strict budget and stick to it to avoid overspending on decor items.
Pro Tips
Editor’s Choice

Fairfield The Original Poly-Fil, Premium Polyester Fiber Fill, Soft Pill…

DECOWALL DS-8044 Animal Alphabet Numbers Colour Decals Stickers Kids Pee…
Common Mistakes to Avoid
Warning: Avoid these pitfalls to ensure a successful decorating project:
- Overcrowding: Stuffing the room with furniture can make it feel cramped. Plan your layout carefully.
- Ignoring Storage: Not providing enough storage leads to clutter. Always include storage solutions.
- Choosing Trends Over Personality: Avoid trendy decor that may not resonate with your child. Focus on their interests.
Common Mistakes to Avoid
Editor’s Choice

Kid Storage Basket Gift Shelf Basket Toy Storage Bin, Nursery Basket Org…

Personalized Name Nursery Wall Decal Vinyl Sticker | Multiple Font Optio…

Flash Furniture Hercules Series Kids Padded Folding Chairs for Children,…
Troubleshooting Section
Problem: The paint color doesn’t match the theme.
Solution: Repaint with a new color or add wall decals that complement the existing shade.
Problem: The room feels cluttered.
Solution: Re-evaluate storage options and declutter items that don’t belong.
Problem: The decor looks mismatched.
Solution: Create a cohesive color palette with accessories that tie everything together.
Troubleshooting Section
Editor’s Choice
Fasmov 3 Pack Paperboard Suitcases Storage Box Decorative Storage Boxes …

4Pcs Pink Pillow Covers, Fashion Woman Watercolor Perfume High Heels Lip…
Variations/Alternative Methods
Consider these variations to achieve a cozy kids’ bedroom:
- Minimalist Approach: Use fewer items and a neutral color palette for a clean look.
- Theme-Based Zones: Divide the room into areas (like a reading nook and play area) based on different themes.
- Nature-Inspired Decor: Use natural materials and colors to create a calming environment.
Variations/Alternative Methods
Editor’s Choice

Rainbow Bedding Set Full Size – 7 Piece Reversible Girls Comforter wit…
HOMORE Kids Educational Rug, Kids Collection Area Rug for Learning Alpha…

Shario Nursery Book Shelves, 4-Pack White Floating Shelves for Wall Kids…
FAQs
- What if I don’t have enough budget for paint? Consider using wall decals or removable wallpaper as a cost-effective alternative.
- How long should I wait for the paint to dry? Generally, 2-4 hours, but always check the paint can for specific recommendations.
- Is it safe to use DIY decor? Yes, as long as you use non-toxic materials and secure items properly.
FAQs
Editor’s Choice

15.7″ X 118″ Black Silk Wallpaper Embossed Self Adhesive Peel and Stick …

Crayola Washable Kids Paint (6ct), School Supplies, Painting Set for Kid…

iMagitek 3 Pack 3D Potted Plants Wall Stickers Removable Tropical Nature…
Conclusion
Congratulations on creating a cozy kids’ bedroom on a budget! You should feel proud of your accomplishment and the personal touches you’ve added. While this guide helped you transform the space, consider maintaining its warmth with regular updates as your child grows.
Next steps could include organizing playtime activities in the new space or involving your child in further decor decisions. Remember, a cozy bedroom is not just about aesthetics; it’s about creating a nurturing environment for your child to thrive. Enjoy the journey!