
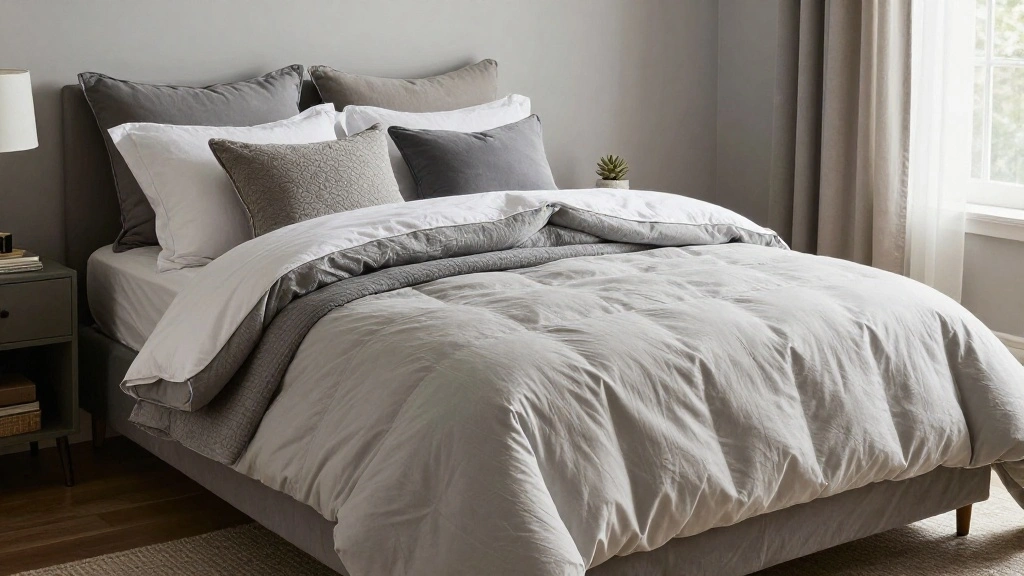
Have you ever walked into a beautifully designed bedroom and wondered how to achieve that luxurious look? The way a bed is layered can transform not just the room, but your overall mood and comfort. A well-layered bed can create a cozy retreat that invites relaxation and rest. Don’t let your bed be just an afterthought!
In this guide, you will learn the essential steps to layer your bed like a designer, including choosing the right bedding, arranging pillows, and adding stylish accents. By the end, your bed will not only look stunning but also feel inviting and comfortable. Difficulty Level: Beginner
Estimated Time: 30-45 minutes
Get ready to impress your guests and elevate your bedroom’s aesthetic with these simple yet effective techniques!
TL;DR Summary
- Gather your materials for bed layering.
- Start with a fitted sheet, add a flat sheet, and follow with a comforter or duvet.
- Incorporate decorative pillows for style and comfort.
- Add finishing touches like throws or blankets for warmth and texture.
TL;DR Summary
Editor’s Choice

Bedsure Duvet Cover Queen Size – 3 Pieces Prewashed Extra Soft Bedding S…

Custom Photo Throw Pillow Personalized Face Pillow with Pet Dog Cat Doub…

Bedsure GentleSoft White Throw Blanket for Couch – Graduation Gifts Teac…
Prerequisites/Materials Needed
- Fitted sheet (1) – size according to your mattress
- Flat sheet (1) – size according to your mattress
- Comforter or duvet (1) – size according to your mattress
- Pillows (2-4) – various sizes for layering
- Decorative pillows (2-4) – to enhance style
- Throw blanket (1) – for added texture
Prerequisites/Materials Needed
Editor’s Choice

MIULEE Pack of 2 Corduroy Decorative Throw Pillow Covers 18×18 Inch Soft…

BOURINA Beige Throw Blanket 50×60 Inches Throw Textured Solid Soft Sofa …
Utopia Bedding Queen Fitted Sheet – Bottom Sheet – Deep Pocket – Soft Mi…
Skill Level & Time Estimate
Skill Level: Beginner
Total Time Estimate: 30-45 minutes
Breakdown:
– Gathering materials: 5-10 minutes
– Layering the bed: 20-30 minutes
– Final adjustments: 5-10 minutes
Skill Level & Time Estimate
Editor’s Choice

Utopia Bedding Queen Bed Skirt – Soft Quadruple Pleated Ruffle – Easy Fi…

CozyLux Queen Comforter Set Dark Grey – Bed in a Bag Queen Size 7 Pieces…
MIULEE Pack of 2 Corduroy Decorative Throw Pillow Covers 18×18 Inch Soft…
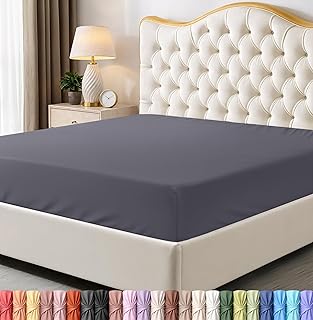
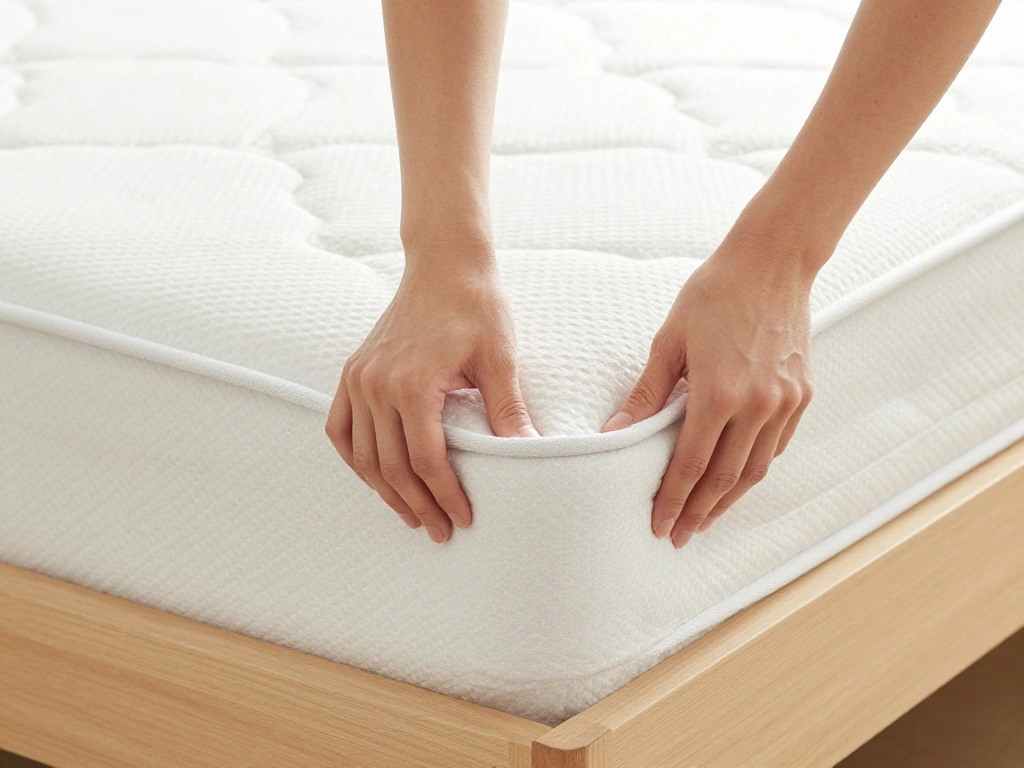
Step 1: Choose Your Base Layer
Start by selecting a fitted sheet that matches your mattress size. This is essential for a tidy and polished look. Follow these steps:
1. Remove any old bedding from the mattress.
2. Put the fitted sheet on the mattress, ensuring the corners fit snugly.
3. Smooth out any wrinkles for a clean appearance.
Pro Tip: Choose a fitted sheet in a neutral color or subtle pattern to create a versatile base.
Why this matters: A well-fitted sheet sets the foundation for a beautifully layered bed. It ensures that the bed looks neat and inviting.
Estimated time for completing this step: 5-10 minutes.
Step 1: Choose Your Base Layer
Editor’s Choice
Utopia Bedding Queen Fitted Sheet – Bottom Sheet – Deep Pocket – Soft Mi…
Step 2: Add the Flat Sheet
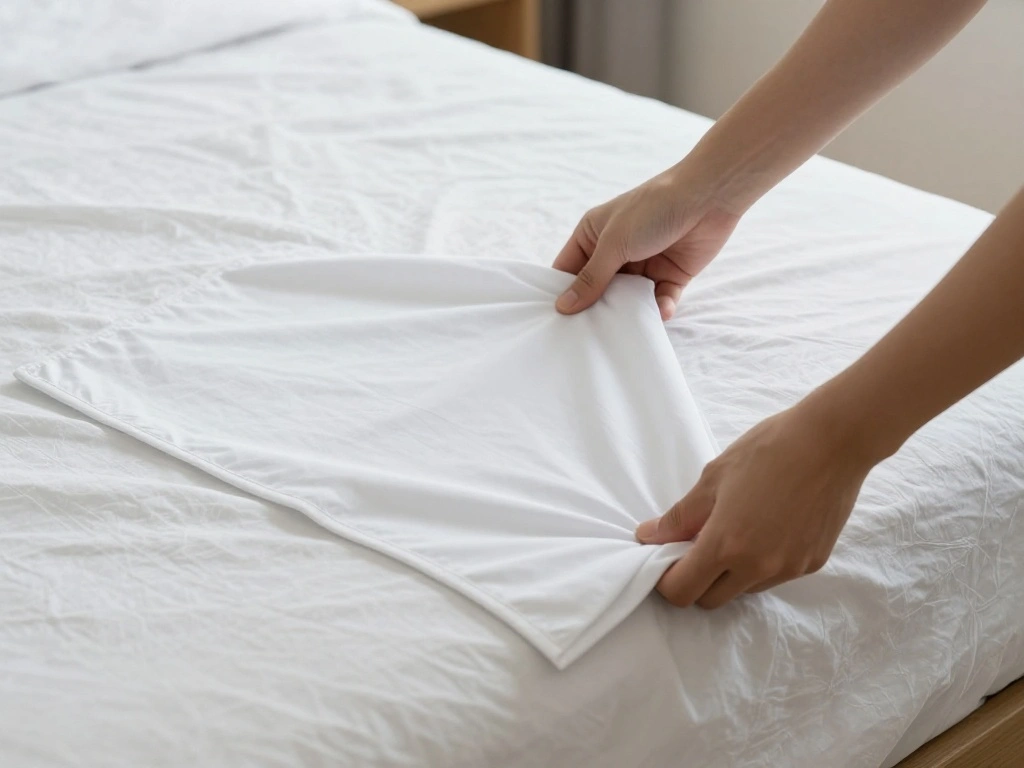
Next, it’s time to add the flat sheet. This layer adds comfort and style. Follow these steps:
1. Lay the flat sheet over the fitted sheet, aligning it evenly on all sides.
2. Tuck the sheet under the mattress at the foot of the bed.
3. Leave the sides untucked for a relaxed look or tuck them in for a more structured appearance.
Warning: Ensure the flat sheet is not too small; otherwise, it may not cover the mattress adequately.
Why this matters: The flat sheet not only adds an extra layer of comfort but also enhances the visual appeal of your bed.
Estimated time for completing this step: 5-10 minutes.
Step 2: Add the Flat Sheet
Editor’s Choice


Royale Linens 100% Organic Cotton Twin Flat Sheet Only – Super Soft – Pe…
Step 3: Layer with a Comforter or Duvet
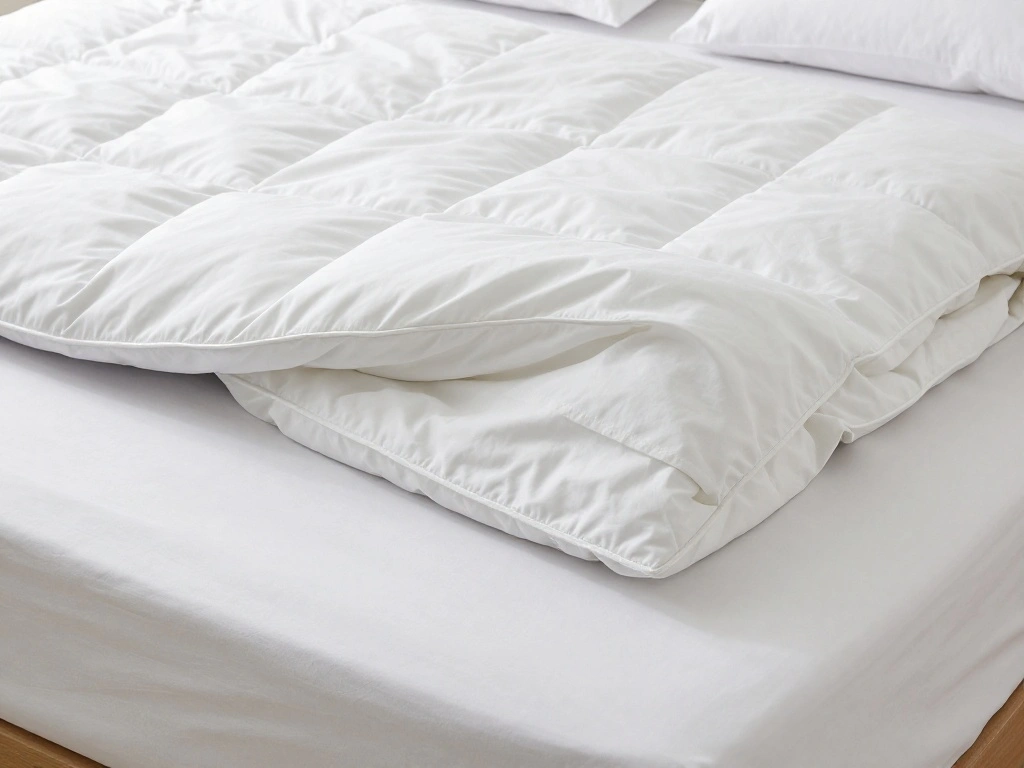
The next step is to add a comforter or duvet, which is crucial for warmth and style. Here’s how to do it:
1. Choose a comforter or duvet that complements your overall bedroom decor.
2. Place it on top of the flat sheet, ensuring it hangs evenly on both sides.
3. Fold down the top edge of the comforter or duvet to reveal the flat sheet underneath.
Pro Tip: Opt for a comforter with a pattern or texture to add visual interest.
Why this matters: This layer provides warmth and an inviting look, making your bed cozy and stylish.
Estimated time for completing this step: 10-15 minutes.
Step 3: Layer with a Comforter or Duvet
Editor’s Choice

FreshCulture Twin Flat Sheets Only, Pack of 6, Soft Microfiber Bedding S…

Bedsure Queen Comforter Set, Beige Soft Prewashed Bedding for All Season…
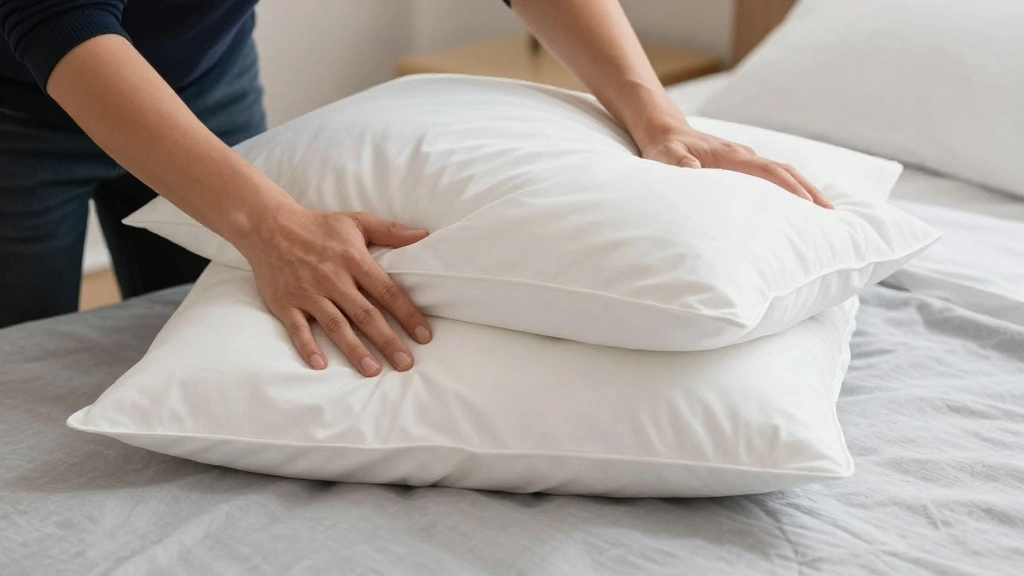
Step 4: Arrange Your Pillows
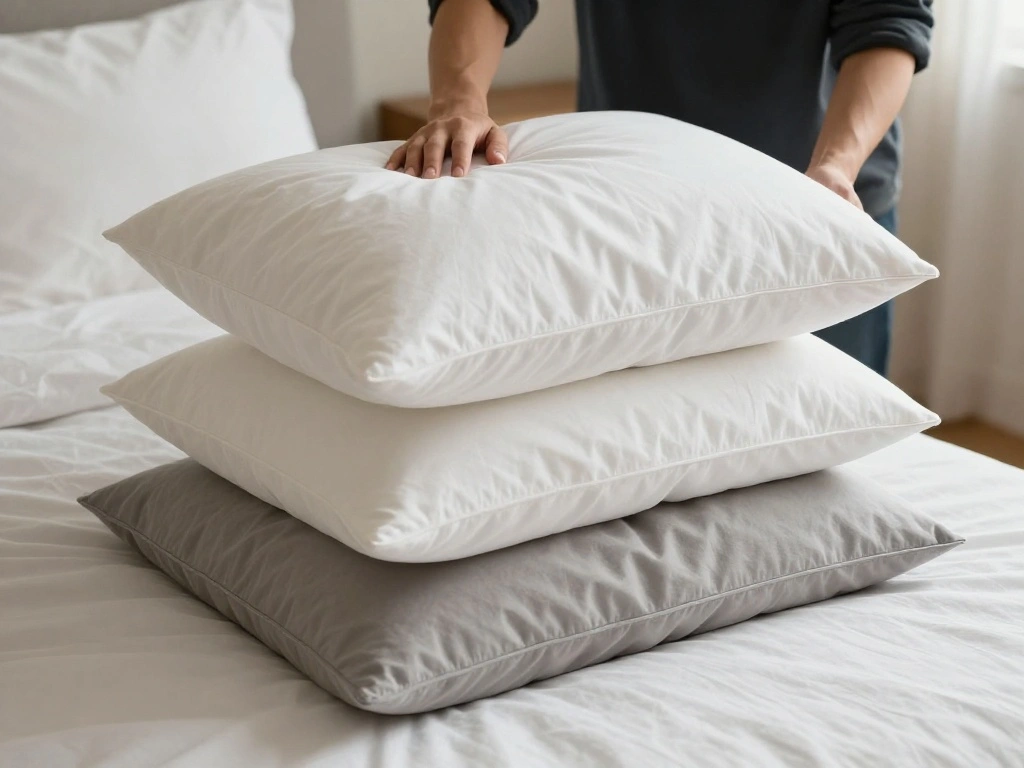
Now it’s time to add the pillows, which are essential for both comfort and style. Follow these steps:
1. Start with your larger sleeping pillows, placing them against the headboard.
2. Add smaller decorative pillows in front of the larger ones, layering them creatively.
3. Consider varying the sizes and shapes for added visual appeal.
Warning: Avoid overcrowding the bed with too many pillows, as it can look cluttered.
Why this matters: Pillows enhance comfort and add a personal touch to your bed’s design.
Estimated time for completing this step: 10-15 minutes.
Step 4: Arrange Your Pillows
Editor’s Choice

Beckham Hotel Collection Bed Pillows Standard/Queen Size Set of 2 – Orig…

4Pcs Pink Pillow Covers, Fashion Woman Watercolor Perfume High Heels Lip…
Step 5: Add a Throw Blanket
Finally, finish off your beautifully layered bed with a throw blanket. This adds texture and warmth. Here’s how:
1. Choose a throw blanket that contrasts with your comforter or duvet.
2. Drape it casually across the foot of the bed or over one side.
3. Adjust the positioning until you achieve a relaxed but intentional look.
Pro Tip: A knitted or textured throw can add a cozy, inviting feel to your bed.
Why this matters: The throw blanket is the finishing touch that brings the whole look together, making your bed a focal point.
Estimated time for completing this step: 5-10 minutes.
Step 5: Add a Throw Blanket
Editor’s Choice

BEDELITE Fleece Decorative Blanket – 3D Jacquard Pink Throw Blankets for…
Step 6: Final Adjustments
Now that you’ve layered your bed, it’s time for some final adjustments to perfect the look. Follow these steps:
1. Stand back and assess the overall appearance of the bed.
2. Smooth out any wrinkles or creases in the bedding.
3. Rearrange pillows or layers as needed for balance and symmetry.
Warning: Avoid overthinking; simplicity often leads to the best results.
Why this matters: Final adjustments ensure that your bed looks polished and inviting, ready for a good night’s sleep.
Estimated time for completing this step: 5-10 minutes.
Step 6: Final Adjustments
Editor’s Choice

Utopia Bedding Down Alternative Bed Pillows for Sleeping Queen Size (Whi…
Pro Tips
- Color Coordination: Stick to a cohesive color palette for a more harmonious look.
- Texture Variety: Mix different textures to create depth and interest.
- Seasonal Changes: Refresh your bedding according to the seasons for a new look.
- Quality Matters: Invest in high-quality sheets and comforters for comfort and durability.
- Personal Touch: Incorporate personal items, like a favorite throw or decorative pillow, to make the space your own.
Pro Tips
Editor’s Choice

Inspirational Women Empowerment Gifts Throw Pillow Covers 18×18, She is …
Utopia Bedding Queen Bed Skirt – Soft Quadruple Pleated Ruffle – Easy Fi…
Common Mistakes to Avoid
Warning: Using mismatched colors: This can make your bed look chaotic. Choose a color scheme that complements your room.
Warning: Overloading with pillows: Too many pillows can make the bed look cluttered. Limit yourself to a few key pieces.
Warning: Neglecting comfort: Always prioritize comfort over aesthetics; choose bedding that feels good to sleep on.
Common Mistakes to Avoid
Editor’s Choice

Bedsure Rose Pink Duvet Cover Queen Size – 3 Pieces Prewashed Cotton-Lik…
Troubleshooting Section
Problem: My bed looks cluttered.
Solution: Remove excess pillows and simplify the layers for a cleaner look.
Problem: The bedding feels uncomfortable.
Solution: Check that you’re using quality materials and consider replacing worn items.
Problem: The bed looks flat.
Solution: Add a thicker comforter or decorative pillows for more height and interest.
Problem: Colors clash.
Solution: Reassess your color palette and choose complementary options.
Problem: Bedding wrinkles easily.
Solution: Opt for wrinkle-resistant fabrics for a neater appearance.
Troubleshooting Section
Editor’s Choice

BEDELITE Pink Queen Comforter Set – 3 Pieces Boho Pintuck Bedding Comfor…
4Pcs Pink Pillow Covers, Fashion Woman Watercolor Perfume High Heels Lip…

Wake In Cloud – Floral Duvet Cover Set, Coquette Cottagecore Aesthetic C…
Variations/Alternative Methods
1. Minimalist Approach: Use fewer layers and stick to monochromatic colors for a sleek, modern look.
2. Bohemian Style: Incorporate eclectic patterns and textures for a more relaxed, carefree vibe.
3. Seasonal Themes: Change bedding and colors according to the seasons for a fresh look throughout the year.
Variations/Alternative Methods
Editor’s Choice

Boho Throw Pillow Covers 18×18 inch Set of 2,Soft Pillowcases Bohemia Ca…

Zzlpp Queen Comforter Set 7 Pieces, Beige Bed in a Bag Queen Size, Tufte…

Love’s cabin Quilts for Queen Bed Sage Bedspreads – Soft Bed Summer Ligh…
FAQs
What if I don’t have a comforter? You can use a thick blanket instead; just ensure it provides warmth.
How long should I leave the flat sheet exposed? A few inches folded over the comforter is ideal for a stylish look.
Is it safe to use decorative pillows while sleeping? It’s best to remove them at night for comfort and safety.
How often should I change my bedding? Ideally, change your sheets weekly and your comforter monthly.
What if my pillows are too flat? Consider replacing them with firmer options for better support.
Conclusion
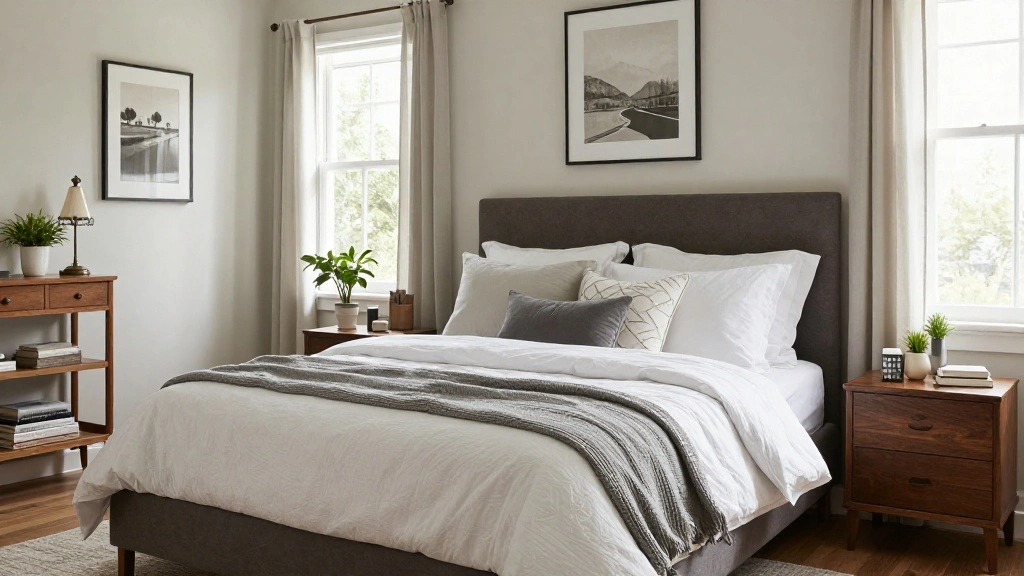
Congratulations! You’ve successfully layered your bed like a designer. Your bedroom now reflects your personal style and invites comfort. Don’t stop here; consider adding decorative elements like artwork or plants to enhance the overall ambiance of your space.
Explore other DIY home decor projects to keep your space feeling fresh and inviting. Remember, a well-layered bed not only looks good but also makes your room a cozy sanctuary where you can unwind. Happy decorating!